


Applying reflective sheeting to an aluminum sign panel is not simply a matter of removing the liner and pressing the film onto the metal. Reliable adhesion and a smooth finished face depend on the condition of the aluminum, the selected sheeting construction, application temperature, film orientation, pressure, trimming and final inspection.
A panel that contains oil, aluminum oxide, dust, burrs or trapped moisture may look acceptable immediately after lamination but later develop bubbles, wrinkles, edge lifting or delamination. Prismatic sheeting can also show inconsistent nighttime brightness when adjacent pieces are installed in different orientations.
This guide explains a practical production process for applying pressure-sensitive reflective sheeting to flat aluminum sign panels. It is intended for traffic sign manufacturers, road safety suppliers, commercial sign shops, distributors and project buyers.
ABLAZE is the reflective material brand of Changzhou Zhenghe New Material Technology Co., Ltd. We supply glass-bead and microprismatic reflective sheeting for traffic signs, safety signs, commercial signage and OEM production. Because adhesive systems and application requirements vary by product, always use this guide together with the technical data sheet for the exact ABLAZE product code and the specification for your project.
Quick Answer: What Is the Correct Application Process?
To apply reflective sheeting to an aluminum sign panel, complete all cutting and drilling first, remove burrs and oxidation, clean the panel until it is smooth, dry and contamination-free, condition both materials at the specified shop temperature, align the sheeting in the correct orientation, and laminate it dry with firm, uniform roller pressure.
Finish by trimming, re-rolling the edges and inspecting the sign for bubbles, wrinkles, lifting, color mismatch and nighttime non-uniformity.
For large backgrounds and production signs, a hand-driven or powered roll laminator usually produces a more uniform result than manual squeegee application.
Why Reflective Sheeting Application Quality Matters
Reflective sheeting is a multilayer optical material. Depending on the grade, it uses glass beads or microprisms to return light toward its source. The face film, optical layer, adhesive and aluminum panel must function as one completed sign system.
Application defects can affect more than appearance:
Poor surface preparation can reduce adhesive contact and cause peeling.
Trapped air or contamination can create bubbles and visible surface distortion.
Uneven pressure can leave weakly bonded areas.
Incorrect prismatic orientation can create a patchwork appearance at night.
Improper splices can buckle, crack or trap water.
Cutting into the panel surface can expose metal and contribute to corrosion.
Applying the wrong sheeting grade can produce a sign that does not meet the project specification.
For regulated traffic signs, always begin with the applicable national, agency or project requirement. Material selection, printing, overlay films, substrate preparation and fabrication may need to follow an approved system rather than a general workshop procedure.
If you are still selecting the reflective grade, read Coefficient of Retroreflection Explained: RA, Observation Angle and Entrance Angle before comparing brightness values.
Before You Start: Match the Sheeting, Panel and Application Method
Successful lamination begins before the liner is removed. Confirm the exact reflective sheeting, aluminum construction and production method in writing.
Which Reflective Sheeting Is Suitable for Aluminum Sign Panels?
The correct material depends on the sign’s function, required visibility, service life, road environment and applicable standard.
Sign application | Material category to evaluate | Main production consideration |
|---|---|---|
Parking, property and general safety signs | Engineering-grade glass-bead or approved entry-level prismatic sheeting | Flat-panel adhesion, cutting and required outdoor life |
Municipal and standard road signs | Project-specified engineering-grade or prismatic sheeting | Compliance, RA, color, imaging method and durability |
Higher-speed roads and more demanding warning signs | High-intensity prismatic or higher-performance project-specified sheeting | Angular performance, orientation, splicing and approved sign system |
Temporary commercial or construction communication signs | Suitable commercial or engineering-grade product | Required service period, printing compatibility and project rules |
Printed aluminum signs | Printable grade approved for the selected ink | Ink adhesion, curing, laminate or clear coat and RA after printing |
For rigid flat aluminum panels, ABLAZE Engineering Grade PET Reflective Sheeting is designed around flat-sign converting and aluminum-panel application.
Buyers can also compare the full ABLAZE Engineering Grade Reflective Sheeting range and High Intensity Prismatic Reflective Sheeting.
Do not select traffic sign material from a marketing grade name alone. Confirm the product code, reflective construction, minimum RA values at the required angles, daytime color, adhesive, approved substrate, printing system, application temperature and durability conditions.
Should You Use a Dry or Wet Application Method?
Use dry application as the default for pressure-sensitive reflective traffic sign sheeting. Do not spray water, detergent solution or application fluid onto the adhesive or aluminum unless the technical data sheet for the exact product expressly permits wet application.
Wet application can interfere with initial adhesive contact, extend drying time and trap moisture. It may also invalidate a product warranty or project approval. A technique that works for ordinary decorative vinyl is not automatically suitable for reflective sign sheeting.
If easier positioning is required, use an approved application method such as a center hinge, an edge hinge, a controlled liner-removal system or a roll laminator rather than adding liquid.
Hand Application or Roll Laminator?
Method | Best use | Main advantage | Main limitation |
|---|---|---|---|
Hand roller or approved squeegee | Small panels, cut letters and limited workshop production | Low equipment requirement | Greater risk of pressure marks, wrinkles and trapped air on large backgrounds |
Hand-driven roll laminator | Small-to-medium production and full-face backgrounds | Controlled, repeatable pressure | Requires correct gap, alignment and operator technique |
Powered roll laminator or squeeze-roll applicator | Large panels and continuous sign production | Uniform pressure and higher productivity | Equipment settings and safety procedures must be controlled |
For full sign backgrounds, especially thicker prismatic products, use a roll laminator whenever the material manufacturer recommends it. Hand application should be limited to sizes and constructions that can be installed without stretching, creasing or uneven pressure.
Tools and Materials Checklist
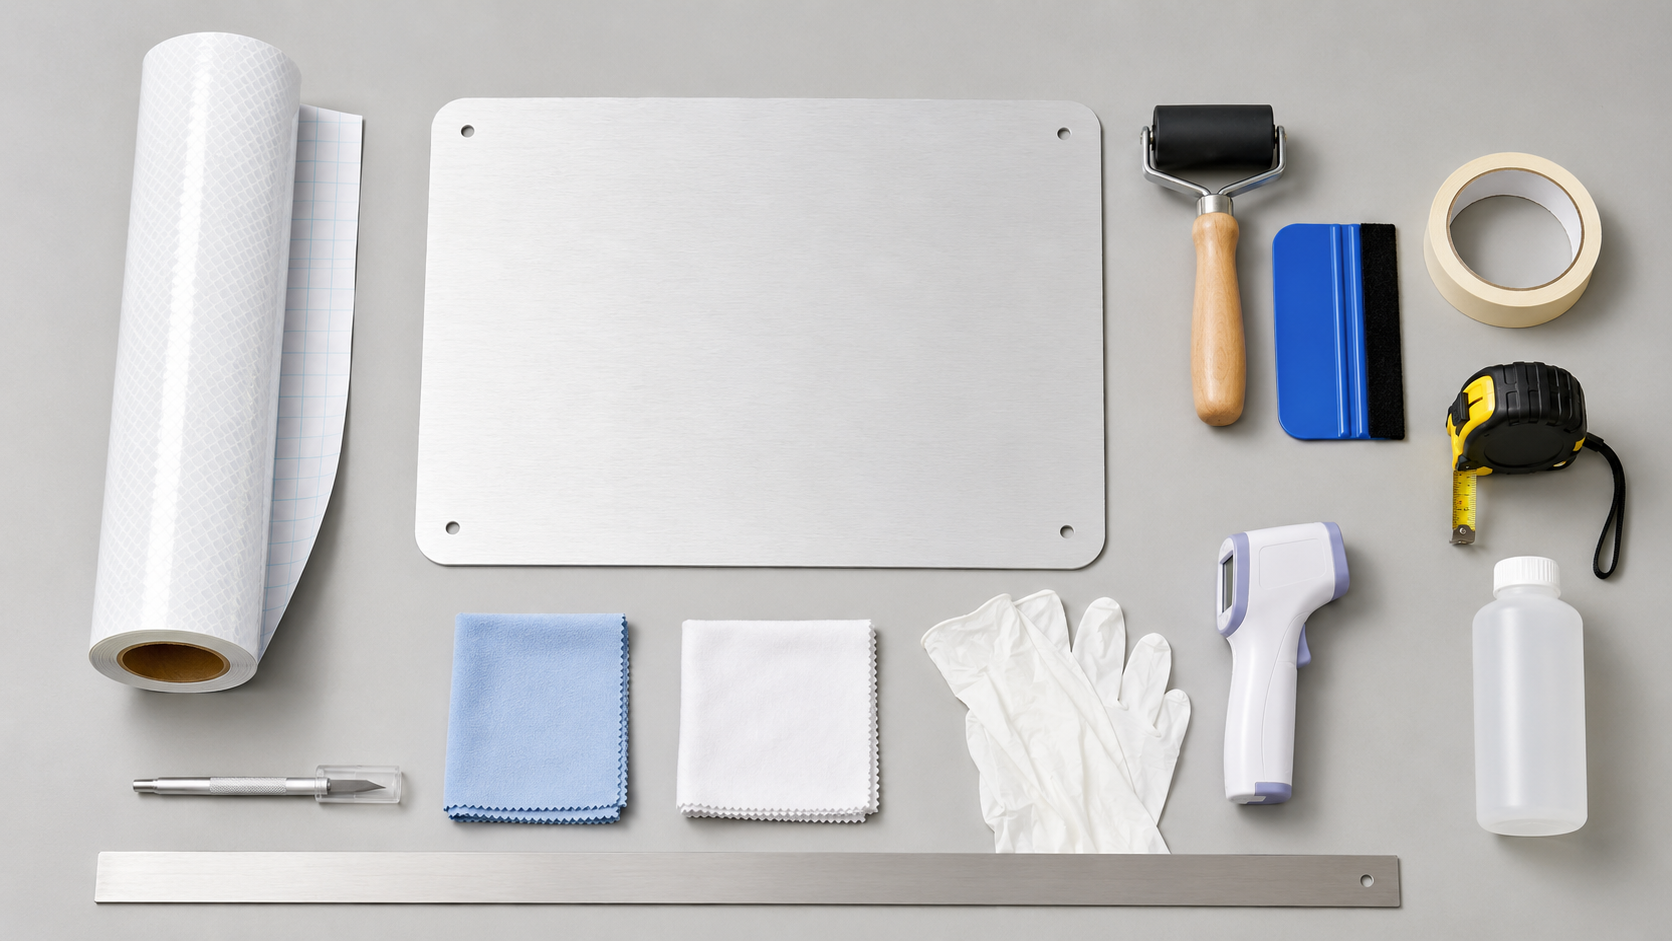
Prepare the following before beginning:
Correct reflective sheeting product, color, lot and roll direction
Flat aluminum sign blank or sign panel
Product technical data sheet and project specification
Clean lint-free wipes
Clean water and a compatible neutral detergent, when required
Manufacturer-approved final cleaning solvent, commonly an appropriate isopropyl alcohol solution
Clean, powder-free gloves
Measuring tape, square and straightedge
Low-tack positioning tape
Sharp cutting tools and a protected cutting surface
Rubber hand roller or manufacturer-approved squeegee
Hand-driven or powered roll laminator for larger panels
Non-contact thermometer or another suitable temperature check
Inspection light and retroreflective viewing light
Edge sealer only when required by the sheeting manufacturer or project specification
Keep silicone sprays, waxes, oily rags, petroleum residues and incompatible cleaners away from the panel and adhesive. Use fresh wipes rather than moving contamination from one area to another.
How to Apply Reflective Sheeting to Aluminum Sign Panels: 10 Steps
Step 1: Inspect and Fabricate the Aluminum Panel
Begin with a panel that is flat, rigid, dimensionally stable and suitable for outdoor use. Common traffic sign specifications use prepared aluminum sheet or extrusion, but the alloy and thickness must follow the relevant project requirement.
Inspect every blank for:
Warping or buckling
Dents and deep scratches
Sharp edges and burrs
White rust or visible aluminum oxide
Oil, grease, dust or fingerprints
Water spots and moisture
Poorly cured paint or coating
Surface texture that may show through the reflective film
Complete cutting, corner radiusing, punching and drilling before the final cleaning. Remove burrs without gouging the sign face. Fabricating the panel after lamination can contaminate or damage the reflective surface and may create stress around holes.
Do not assume that every powder-coated, painted or reclaimed aluminum panel is compatible. Coating chemistry, cure, surface energy, outgassing and contamination can change adhesion. Test the complete construction before production.
Step 2: Prepare the Aluminum Surface
Reflective sheeting needs intimate contact with a smooth, stable surface. New untreated aluminum, reclaimed panels and coated aluminum require different preparation.
For production traffic signs, the most reliable option is usually aluminum supplied by an experienced sign-panel processor and prepared to the sheeting manufacturer’s requirements.
Industrial degreasing, etching and conversion treatment may be specified. These chemical processes require trained personnel, controlled baths, suitable protective equipment and correct waste handling. Follow the panel supplier, sheeting manufacturer and project procedure rather than improvising a chemical treatment in the sign shop.
For a panel that has already received the required treatment, avoid aggressive abrasion unless the approved process calls for it. Abrasion can change surface roughness, damage a protective conversion layer and create lines that remain visible through the sheeting.
Reclaimed aluminum must be evaluated carefully. Remove every trace of the old adhesive, ink, corrosion and cleaning residue. If the panel cannot be restored to a smooth, stable and compatible surface, replacement is safer than applying new reflective sheeting over an uncertain substrate.
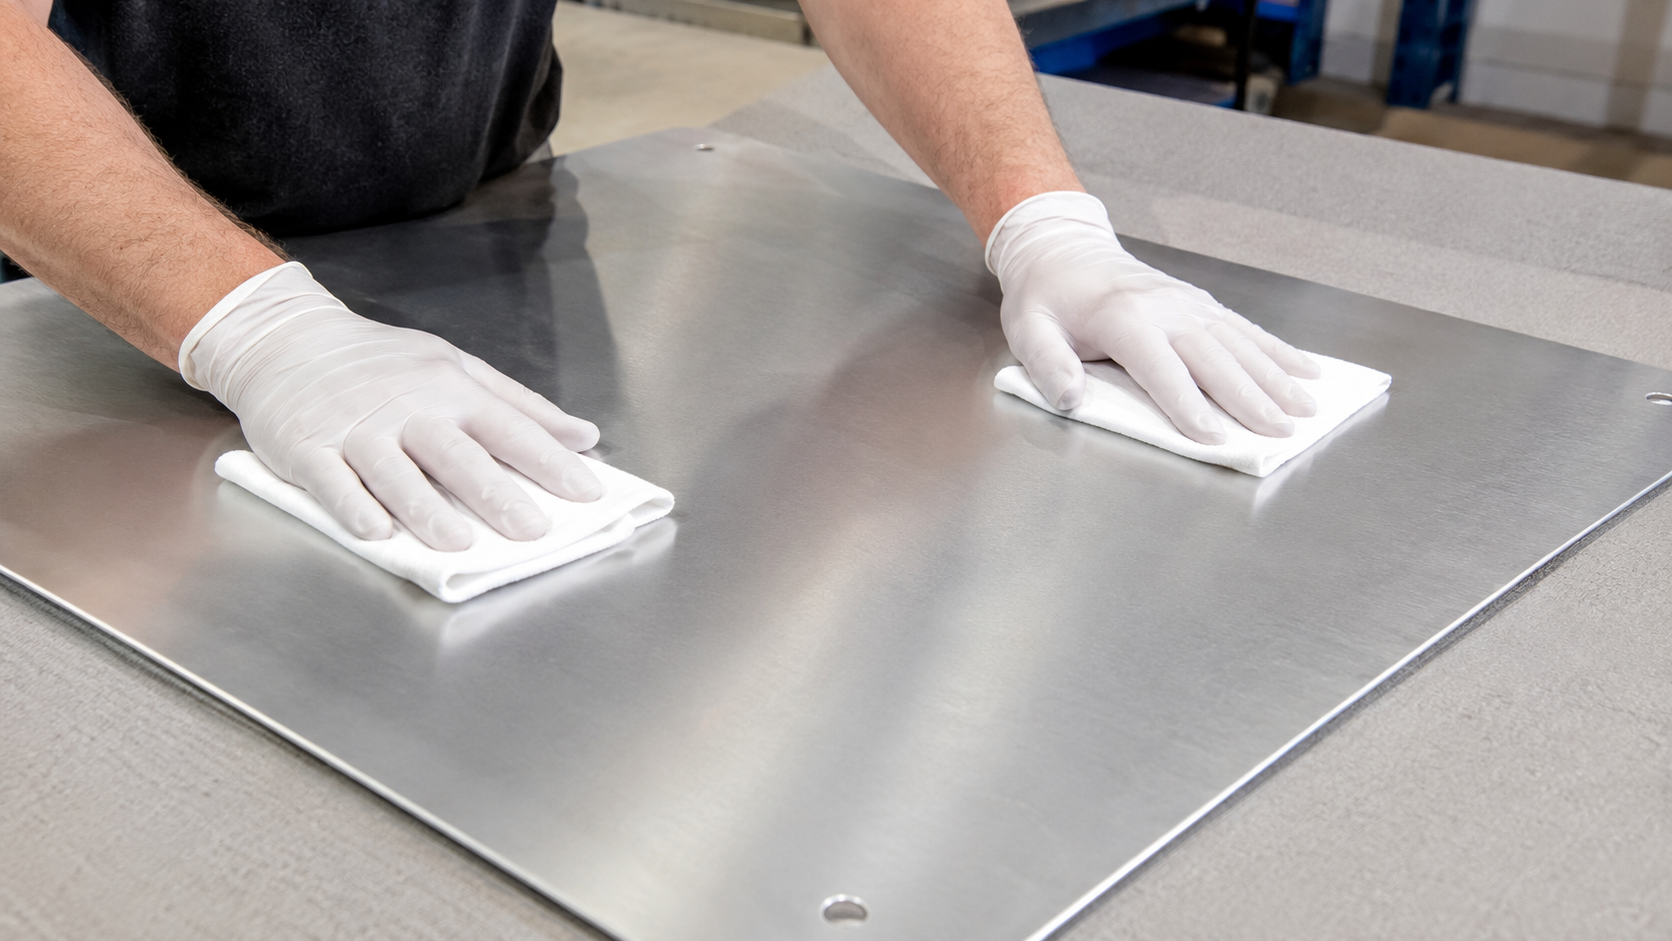
Step 3: Clean, Rinse and Dry the Panel
Use the cleaning sequence specified for the panel and adhesive. A common workshop sequence for an already prepared compatible panel is:
Remove loose dust and particles.
Wash away water-soluble dirt with clean water and a compatible neutral detergent when necessary.
Rinse thoroughly so no detergent remains.
Use a manufacturer-approved final solvent wipe to remove residual oil or fingerprints.
Wipe in one direction with a clean cloth, then dry with a second clean cloth before the solvent evaporates on the surface.
Allow the panel, edges and holes to dry completely.
Do not use a dirty cloth repeatedly across the entire panel. Change wipes as soon as they show contamination.
On appropriately prepared bare aluminum, a water-break test may be used as one process check: clean water should form a continuous sheet rather than separating around contaminated areas. This is not a substitute for the complete surface-preparation method required by the material or project.
After final cleaning, handle the panel only by its edges or with clean gloves. Do not set tools, liner scraps or bare hands on the application face.
Step 4: Condition the Sheeting and Panel
Bring the reflective sheeting, aluminum panels and application equipment into the same controlled work area before lamination.
Cold rolls may remain cold internally even when the outer layers feel warm, and a cold panel brought into a warm room may develop invisible condensation.
A practical controlled-shop range is often around 18–25°C (64–77°F), but this is not a universal specification. The minimum and maximum application temperatures depend on the exact adhesive and sheeting construction. Follow the product technical data sheet.
Before application:
Allow the roll and panels enough time to reach a uniform temperature.
Confirm that no condensation is present.
Keep the work surface clean and flat.
Do not apply to a panel heated by direct sunlight.
Do not use a heat gun as a substitute for proper conditioning unless the approved procedure specifically requires localized heat.
Temperature affects adhesive flow and initial contact. Too-cold application can produce weak tack, while excessive heat may make alignment difficult or affect a sensitive film construction.
Step 5: Plan Roll Direction, Orientation and Splices
Before cutting, mark the machine direction or roll direction on the liner of every piece.
This is especially important for microprismatic sheeting. Adjacent panels or cut components installed at different orientations can appear unequal under vehicle headlights even when they come from the same product and color.
Use these planning rules:
Keep all pieces on one sign in the manufacturer-approved orientation.
Use the same production lot or matched roll whenever possible.
Plan the fewest practical seams.
Confirm whether the product requires butt splices, overlap splices or no splices.
Keep seams away from critical legends where the project specification requires it.
For multi-panel signs, apply each physical panel separately and cut the sheeting at every panel joint.
Do not bridge a structural joint with one uncut sheet.
When a prismatic product contains orientation marks, seal lines or an identifiable web direction, preserve that reference through cutting and application.
Step 6: Cut and Position the Reflective Sheeting
Cut the sheeting on a clean, protected surface. For a full-face background, allow a small amount of excess for final trimming or the specified edge wrap. Do not drag the reflective face across a dirty table.
Position the piece on the panel with the liner still attached. Check:
Top and bottom orientation
Left and right alignment
Graphic or print direction
Required edge allowance
Seam location
Color and lot match
Panel identification
Use low-tack positioning tape that will not contaminate or damage the reflective face. Avoid folding or sharply creasing the material. Prismatic sheeting is generally thicker and more sensitive to creasing than ordinary sign vinyl.
Never cut directly against the final sign face in a way that scores the aluminum, damages a protective coating or cuts into previously applied reflective sheeting. Use an edge trimmer, protected straightedge or cutting table as appropriate.
Step 7: Apply the Sheeting with Uniform Pressure
Remove the liner gradually rather than exposing the entire adhesive at once. Keep the adhesive away from dust, clothing, the floor and fingers.
For hand application, use a center-hinge or edge-hinge method suitable for the panel size. Hold the unapplied sheeting slightly away from the panel and press it down progressively with firm, overlapping strokes. Direct the pressure toward an open edge so air is not trapped.
For machine application, align the leading edge squarely, set the nip or roller gap according to the equipment and material, and feed the panel without twisting. Allow the machine to strip the liner and laminate the film in one controlled movement where the equipment is designed for that process.
In both methods:
Apply pressure across the complete width.
Keep the film relaxed; do not stretch it.
Do not allow the liner to pull the sheeting out of alignment.
Do not stop abruptly in the middle of a visible area if this could create a pressure line.
Never re-lay a large area after the pressure-sensitive adhesive has made full contact unless the product is specifically repositionable.
Pressure is what creates contact between a pressure-sensitive adhesive and the microscopic texture of the panel. Merely laying the film on the metal is not enough.
Step 8: Trim, Re-Roll and Finish the Edges
After lamination, trim the reflective sheeting according to the sign design and product instructions.
For a flush-trimmed flat panel:
Use a sharp blade or proper edge-trimming tool.
Keep the cut clean and continuous.
Avoid shaving metal or cutting into the panel finish.
Remove loose slivers and adhesive strings.
For an extruded panel or a design requiring an edge wrap, use only the approved wrap dimension and forming process. Some prismatic constructions need controlled warming and dedicated edge rollers; others are intended only for flat application.
Re-roll the entire perimeter with firm pressure. Pay special attention to corners, holes, seams and any area where the applicator changed direction.
Apply edge sealer only when it is required for the exact sheeting construction or project. More edge sealer is not automatically better, and an unapproved chemical may attack the face film or adhesive.
Step 9: Add Legends, Printed Graphics or Protective Films
The correct sequence depends on the sign-making system. A sign may use:
Screen-printed reflective background sheeting
Digitally printed reflective sheeting
Transparent colored overlay film
Opaque cut letters, symbols and borders
Reflective cut copy on a reflective background
A protective overlay or anti-graffiti film
Use inks, overlays, application tape and protective films approved for the selected reflective sheeting. An ordinary clear laminate can change retroreflectivity, color, gloss, flexibility and outdoor durability.
When applying cut legends:
Keep prismatic orientation consistent where reflective copy is used.
Remove application tape at the recommended angle and timing.
Re-roll the finished copy if the system instructions require it.
Cut graphics at physical joints between extruded or assembled panels.
Do not allow a legend or border to hold two moving panels together.
For printing guidance, see the Printable Reflective Sheeting for Digital Printing Buying Guide.
Step 10: Allow Bond Development and Inspect the Finished Sign
Pressure-sensitive adhesives develop bond strength over time. Follow the product-specific dwell period before aggressive handling, packaging, water exposure or field installation.
Keep finished signs in a clean, controlled area. Do not stack reflective faces directly against rough backs, dirty cardboard or another adhesive edge. Use a clean, non-abrasive interleaf when required.
Inspect the sign under normal shop light, low-angle light and retroreflective illumination. Check:
Smoothness and flatness
Bubbles, wrinkles and tunnels
Trapped particles
Edge lifting
Corner adhesion
Seam accuracy
Cuts and scratches
Daytime color match
Nighttime brightness uniformity
Correct prismatic orientation
Clean legends and borders
Panel identification and traceability
Record the sheeting product code, color, lot number, roll number, panel number, application date, operator and inspection result. Traceability makes later troubleshooting much faster.
How to Apply Reflective Sheeting by Hand
Hand application is most suitable for small panels, cut copy and short production runs when the product instructions permit it.
Center-Hinge Method
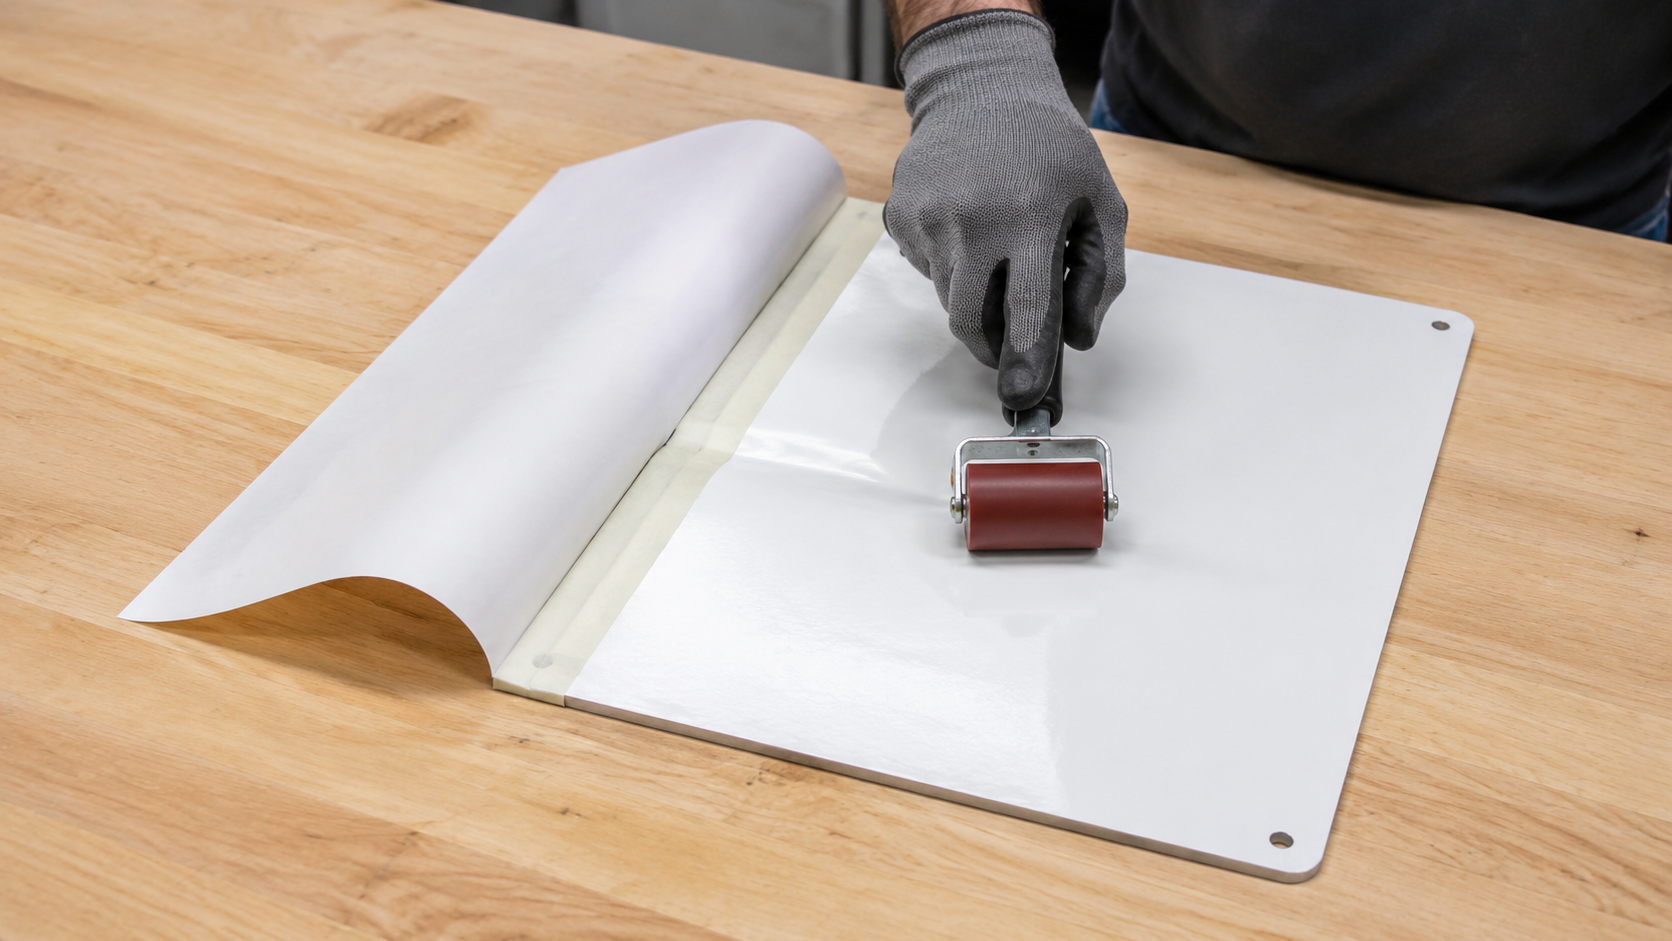
Place the cut sheeting on the panel with the liner attached.
Confirm orientation and alignment.
Apply a low-tack tape hinge across the center.
Fold one half back without creasing the film.
Peel the liner back to the hinge and cut only the loose liner on a safe surface.
Hold the exposed sheeting slightly above the panel.
Starting at the hinge, apply firm overlapping strokes toward the open edge.
Remove the hinge, peel the remaining liner gradually and apply the second half.
Re-roll the complete face and perimeter.
Inspect from several angles.
The exact stroke angle matters less than maintaining uniform pressure and always leaving trapped air a route to an open edge. Do not press the outer perimeter first and then try to force air out of a sealed center.
Edge-Hinge Method
An edge hinge can work for narrow pieces or small signs:
Align the sheeting with the liner in place.
Secure one edge with low-tack tape.
Fold the piece back carefully.
Remove a short section of liner.
Tack the leading strip squarely.
Continue removing the liner while rolling from the fixed edge toward the opposite edge.
If the panel is too large to keep the film relaxed and aligned, stop and use a roll laminator. Adding more installers does not always solve the pressure and alignment problem.
How to Apply Reflective Sheeting with a Roll Laminator
A roll laminator is the preferred method for many full-background signs because it applies consistent pressure across the panel.
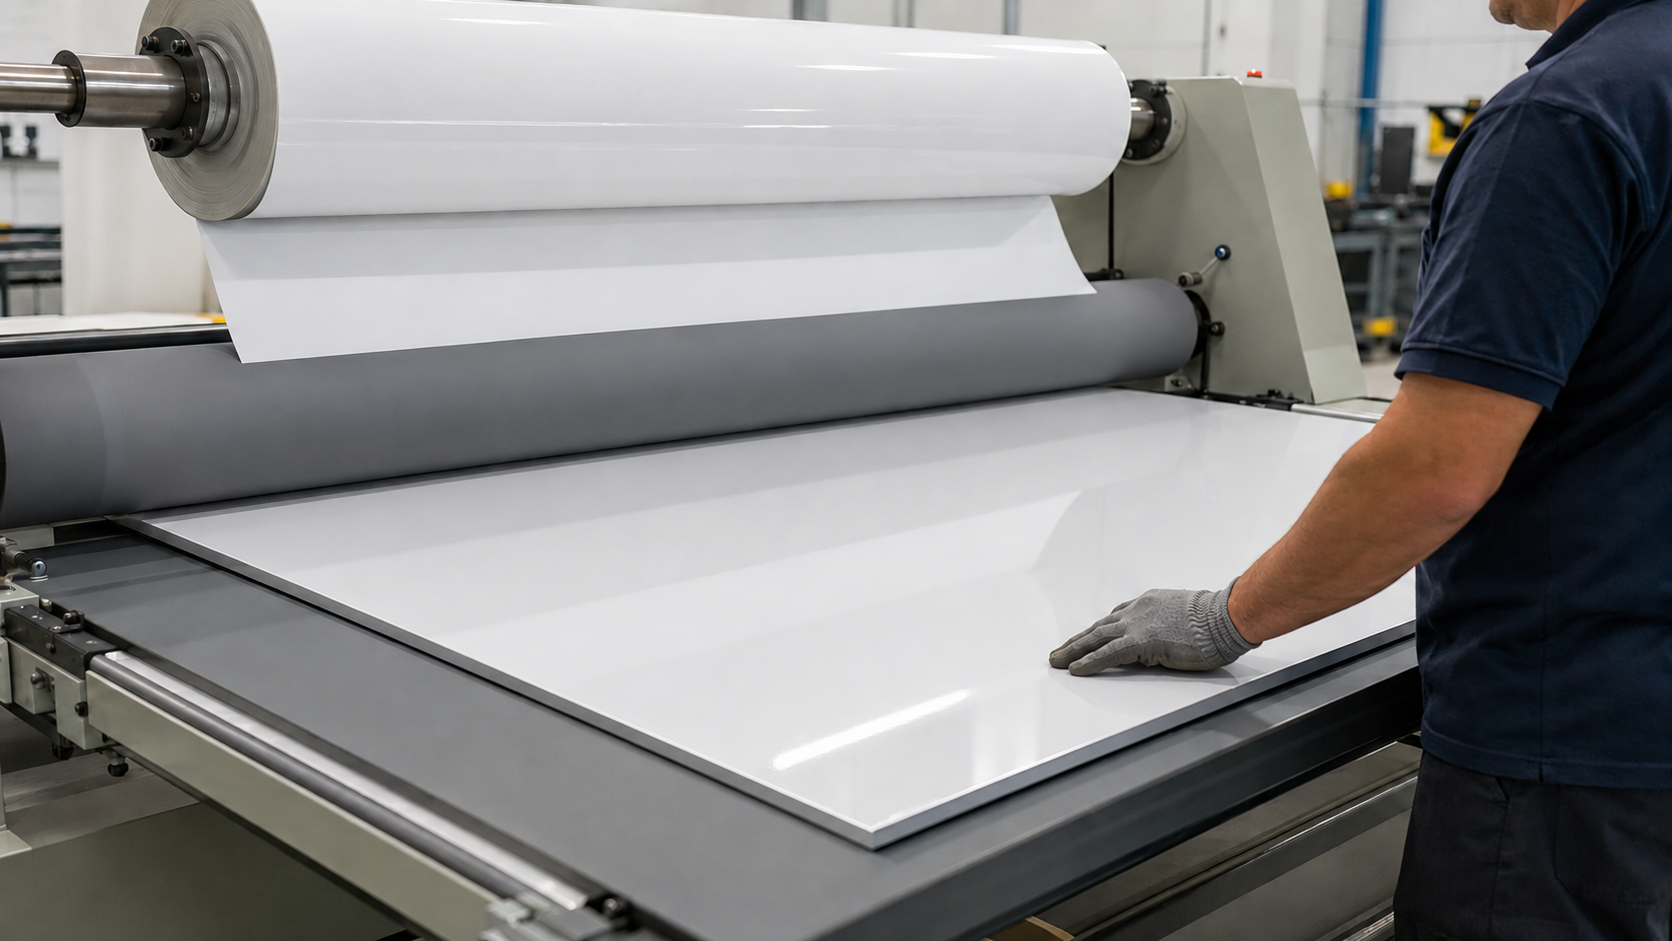
Use the following general workflow:
Clean the rollers, infeed table and surrounding area.
Check machine guards and follow the equipment safety procedure.
Set the roller gap or nip pressure for the panel and sheeting construction.
Make a trial application on scrap material.
Align the sheeting and panel squarely to the roller.
Establish a straight, well-bonded leading edge.
Feed at a steady speed while the liner is removed under control.
Keep the roll centered and prevent lateral drift.
Support the panel as it exits so its weight does not bend the sign or pull the film.
Re-roll edges and inspect for pressure lines or unbonded zones.
Do not assume that maximum roller pressure is best. Excessive pressure or incorrect roll tension can distort material, create tracking problems or mark the surface. Use the equipment and sheeting supplier’s settings.
For repeated production, record machine gap, speed, material temperature, panel thickness and operator. A documented setup reduces variation between shifts.
How to Handle Splices on Large Aluminum Sign Panels
Splice design is product- and specification-dependent. Never copy the seam method from a different reflective technology without checking the current instructions.
Prismatic Reflective Sheeting
Prismatic sheeting is generally butt spliced rather than overlapped. Overlapping thick prismatic films can create a raised stress line, and temperature movement may contribute to buckling, cracking or delamination.
Good practice includes:
Maintain the same orientation in adjacent pieces.
Match pieces from the same lot or roll where possible.
Use the product-specified butt gap; a small gap is often required rather than forcing the edges together.
Keep the joint straight and clean.
Prefer a vertical seam where the sign design and project rules allow it, so water can drain naturally.
Do not cut through the prism face of the first sheet while trimming the second sheet in place.
The permitted gap is not universal. Follow the technical data sheet and contract specification for the exact product.
Glass-Bead Reflective Sheeting
Depending on the product and sign specification, glass-bead sheeting may permit a butt splice or an overlap splice.
If an overlap is approved:
Use the specified overlap width.
Keep the overlap straight and uniform.
For a horizontal shingle-style seam, place the upper sheet over the lower sheet so water sheds across the joint.
Do not trap screen ink, dirt or liquid between the layers.
If the finished sign is printed with transparent colors, the approved system may require butt joints to prevent a visible dark double layer. Confirm before fabrication.
Multi-Panel and Extruded Signs
For large assembled signs:
Sheet each panel or extrusion according to its fabrication drawing.
Maintain orientation across the complete assembled sign.
Match color and nighttime appearance before final assembly.
Cut reflective sheeting, legends, overlays and borders at every physical panel joint.
Prepare external flanges and wrapped edges to the same required cleanliness as the face.
Never bridge a moving joint with reflective film.
Assemble or mock up adjacent panels for a nighttime uniformity check before shipping when the project is visually critical.
Common Reflective Sheeting Application Problems and Solutions
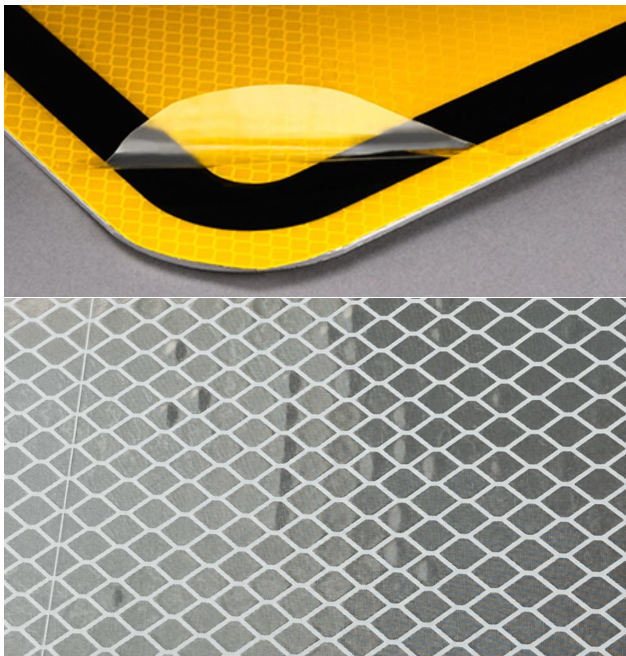
Problem | Likely causes | Corrective action |
|---|---|---|
Bubbles immediately after application | Liner removed too quickly, panel contaminated, pressure applied around the perimeter first, uneven hand pressure | Improve cleaning and liner control; apply progressively toward an open edge; use a roll laminator for larger panels |
Bubbles appearing later | Moisture, solvent trapped under film, panel or coating outgassing, corrosion, insufficient initial pressure | Confirm panel compatibility and cure; allow all liquid to evaporate; test the complete substrate system before production |
Wrinkles or creases | Film stretched, panel fed out of square, material too cold, sheeting allowed to sag or touch early | Condition materials, improve alignment and support, reduce exposed adhesive area, use controlled roll application |
Edge lifting | Contaminated edges, burrs, insufficient perimeter pressure, incompatible substrate, low application temperature | Reprepare panel edges, apply within specification, re-roll perimeter and verify adhesive compatibility |
Poor adhesion across the panel | Oil, oxide, cleaning residue, low-surface-energy coating, inadequate pressure | Stop production; review substrate preparation and test the actual panel with the exact sheeting |
Cracking at a seam or wrapped edge | Prismatic film overlapped, edge radius too tight, material folded cold, unsupported expansion | Use the approved butt splice or edge-forming method and confirm minimum radius and temperature |
Patchy brightness at night | Different prismatic orientations, different lots, surface contamination, pressure damage | Mark roll direction, keep orientation consistent, match lots and inspect under retroreflective illumination |
Visible line at a splice | Incorrect overlap, forced butt joint, double layer under transparent ink, mismatched orientation | Follow the product-specific seam design and position seams before printing or laminating |
Surface scratches | Dirty table or rollers, abrasive cloth, liner debris, stacking without protection | Clean equipment, use non-abrasive interleaf and handle the reflective face carefully |
Ink or overlay peeling | Incompatible surface, ink, cure or laminate; contamination; insufficient dwell | Qualify the complete imaging system and repeat adhesion tests after full curing |
Do not automatically puncture a bubble in safety-critical or long-life sign sheeting. A pin can damage the weather surface, optical layer or sealed prism cell.
Small defects should be evaluated under the manufacturer’s repair procedure. Large bubbles, creases or contaminated areas usually require replacement.
For a deeper diagnosis, read Reflective Sheeting Defects and Troubleshooting.
Finished Sign Quality-Control Checklist
Use this checklist before releasing a sign for packaging or installation.

Material Verification
Correct ABLAZE product code and reflective grade
Correct color and roll width
Correct production lot and orientation
Required technical documents available
Material within the specified storage and use period
Aluminum Panel Verification
Correct alloy, thickness and dimensions for the project
Panel flat and free from dents
Holes, corners and edges completed before cleaning
No burrs, oxide, oil, dust or moisture
Coating or treatment compatible and fully cured
Process Verification
Sheeting and panel conditioned to the specified temperature
Correct dry application method used
Roller or squeegee pressure applied uniformly
Machine setup recorded for production runs
Approved splice type and gap or overlap used
Prismatic orientation consistent
Finished Appearance
No unacceptable bubbles, wrinkles or tunnels
No trapped particles or pressure marks
Edges and corners fully bonded
Seams straight and within specification
No cuts into the aluminum face
Legends, symbols and borders correctly positioned
Daytime color uniform across pieces and panels
Nighttime brightness uniform at the required viewing geometry
Final Documentation
Product lot and panel number recorded
Operator and date recorded
Inspection results recorded
Reference or witness sample retained where required
Packaging protects the reflective face
For incoming material and batch-level checks, use the Reflective Sheeting Quality Buyer Checklist.
For adhesion, shrinkage and environmental screening methods, see Reflective Sheeting Adhesion, Shrinkage and Weather Tests.
Which ABLAZE Reflective Sheeting Should You Use?
The application method cannot compensate for selecting the wrong material. Send the following information before requesting a recommendation:
Country and final sign application
Applicable standard or project specification
Sign panel alloy, coating and dimensions
Flat sheet, extrusion or assembled multi-panel construction
Required reflective grade and color
Observation and entrance angle requirements, if specified
Screen printing, digital printing, overlay film or cut-copy method
Expected outdoor service environment
Required roll width, roll length and order quantity
Hand application or roll-laminator equipment
Packaging, documentation and private-label requirements
For standard flat aluminum signs, evaluate the ABLAZE Engineering Grade PET Reflective Sheeting or ABLAZE EGP Reflective Sheeting according to the project requirement.
For more demanding traffic sign applications, review ABLAZE High Intensity Prismatic Reflective Sheeting.
Visit Road Safety and Traffic Sign Reflective Sheeting Solutions for an overview of available product categories and applications.
Frequently Asked Questions
Can Reflective Sheeting Be Applied Directly to Raw Aluminum?
Only when the aluminum has been prepared according to the reflective sheeting and project requirements.
Untreated raw aluminum may contain oil, oxide, low-energy areas or surface irregularities that reduce adhesion. Production sign panels are commonly degreased and chemically prepared by an experienced panel processor before lamination.
Do I Need to Sand an Aluminum Sign Panel Before Applying Reflective Sheeting?
Not automatically.
Sanding may remove oxide or old material on a reclaimed panel, but it can also create scratches, leave abrasive residue or damage a protective treatment.
Use the approved preparation process for the exact panel. A new chemically treated sign blank normally should not be sanded without a specific reason.
Can I Use Soapy Water to Install Reflective Sheeting?
Do not wet apply reflective sign sheeting unless the exact product’s technical data explicitly permits it.
Many pressure-sensitive reflective products are designed for dry application. Liquid can reduce initial adhesive contact, trap moisture and affect long-term performance.
What Is the Best Temperature for Applying Reflective Sheeting to Aluminum?
Use the range specified for the exact product.
A controlled room near 18–25°C (64–77°F) is a practical shop condition for many products, but some adhesives have different minimum or maximum application temperatures.
The panel and the complete roll—not only the surrounding air—must be properly conditioned.
How Can I Avoid Bubbles Under Reflective Sheeting?
Use a smooth, clean and completely dry panel; remove the liner gradually; keep the film relaxed; apply uniform overlapping pressure toward an open edge; and use a roll laminator for large backgrounds.
Do not seal the perimeter before the center has been laminated.
Can I Apply Reflective Sheeting by Hand to a Large Sign Panel?
It may be physically possible, but full-background hand application increases the risk of trapped air, wrinkles, visible pressure variation and misalignment.
A hand-driven or powered roll laminator is normally more reliable for large panels, especially with thick prismatic sheeting.
Should Prismatic Reflective Sheeting Be Overlapped at a Seam?
Usually not.
Many prismatic traffic sign products require butt splices with a small specified gap because an overlap can create a raised stress line and later buckling or cracking.
Follow the exact manufacturer’s instructions and project specification.
Why Do Two Adjacent Pieces Look Different at Night?
The pieces may have different prismatic orientations, production lots, surface cleanliness or application damage.
Mark the roll direction before cutting, keep all pieces in an approved common orientation and check the assembled sign under retroreflective illumination.
Can Reflective Sheeting Be Applied Over Old Reflective Film?
Applying new sheeting over old film is generally a poor production practice unless a specific overlay system has been approved.
The old surface may be weathered, contaminated, cracked or weakly bonded. Remove the old material and prepare the aluminum, or use a new panel when reliable restoration is not possible.
Does Every Finished Sign Need Edge Sealer?
No.
Use edge sealer only when the reflective sheeting manufacturer or project specification requires it. The sealer must be chemically compatible with the face film, adhesive and aluminum treatment.
How Long Should a Newly Sheeted Sign Wait Before Installation?
Follow the product-specific bond-development and handling instructions.
Adhesion normally increases after application, so avoid immediate water exposure, rough stacking or severe handling.
For production control, inspect the sign after the specified dwell period rather than judging adhesion only in the first few minutes.
How Should I Test Adhesion Before a Bulk Production Run?
Make a trial sign or witness panel using the actual aluminum, preparation method, reflective sheeting, application temperature and roller settings.
Inspect initial tack and adhesion after the agreed dwell period, then perform any project-required peel, water, heat or weather test.
Do not qualify the material only on glass or a different coated panel.
Conclusion
The most reliable way to apply reflective sheeting to an aluminum sign panel is to treat the panel, sheeting and application process as one controlled system.
Start with a compatible flat aluminum substrate. Complete all fabrication before cleaning. Keep the panel free from oxide, oil, particles and moisture. Condition the sheeting and metal, maintain roll direction, choose the correct splice, and use uniform pressure through a roll laminator whenever possible.
Finish with edge rolling, controlled bond development and both daytime and nighttime inspection.
Correct application cannot turn an unsuitable reflective film into a compliant traffic sign material. The sheeting grade, optical performance, adhesive, imaging method, substrate preparation and project standard must all match.
ABLAZE, the reflective material brand of Changzhou Zhenghe New Material Technology Co., Ltd., supplies engineering-grade PET, EGP, high-intensity prismatic and other reflective materials for sign manufacturers, road safety distributors and OEM buyers.
Contact ABLAZE with your sign dimensions, aluminum specification, required reflective grade, printing method, destination market and order quantity. Our team can recommend a suitable product and arrange samples for aluminum-panel application testing before bulk production.
RELATED NEWS

License Plate Reflective Sheeting Guide: ISO 7591
License plate reflective sheeting is not simply a reflective sticker applied to an aluminum plate. It is a functional component of a regulated vehicle identification system.The material must maintain nighttime retroreflectivity, daytime color, adhesion and surface integrity after lamination, embossi

DOT-C2 or ECE R104? Why Conspicuity Tape That Passes in Texas Fails in Rotterdam
DOT-C2 or ECE R104? Why Conspicuity Tape That Passes in Texas Fails in RotterdamSame red-and-white reflective tape. Two regulatory systems that share almost nothing — not the colours, not the widths, not the coverage maths, not the approval mark. A sourcing guide for fleets, trailer builders and dis